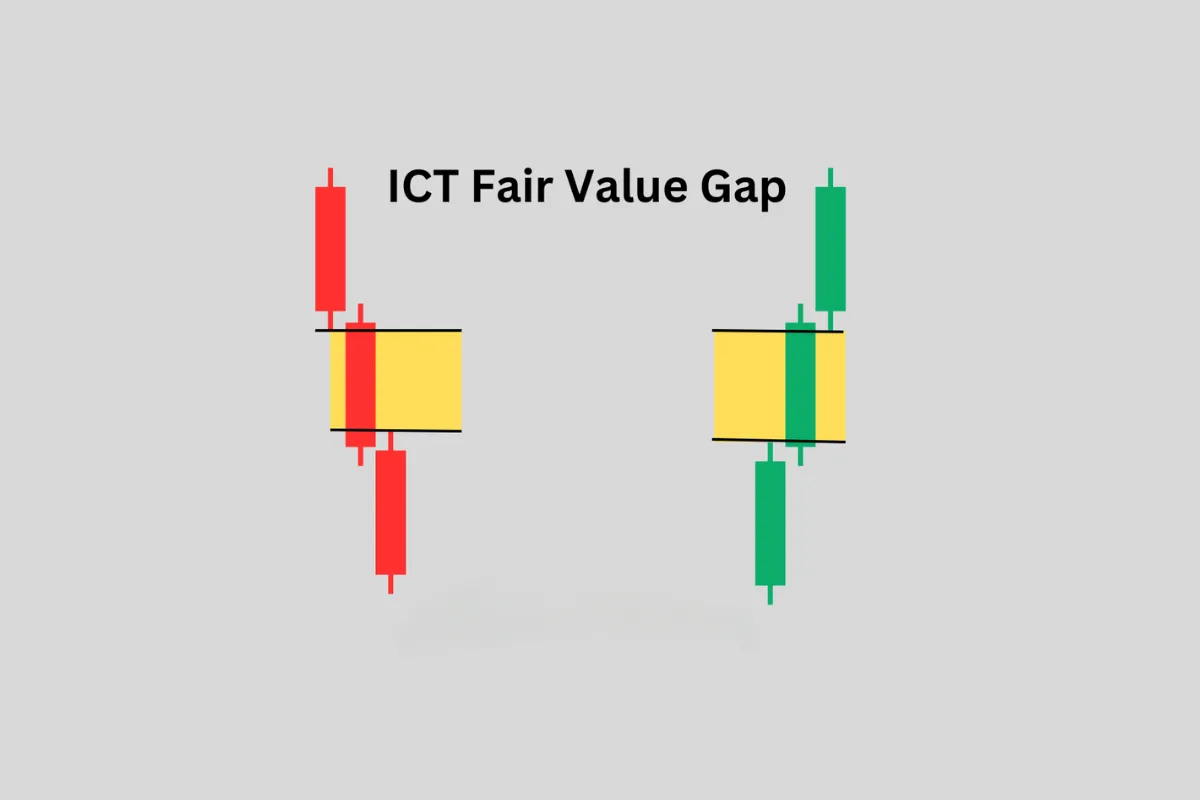
ICT SIBI and BISI: Naming Bullish and Bearish Imbalances
Understand how ICT terminology labels bearish and bullish three-candle imbalances, and use consistent definitions to record revisits without assuming that the gap reveals institutional activity or predicts direction.
Framework note: ICT terms are interpretations of price action, not proof of institutional motives or a market algorithm’s intent. No setup is guaranteed. Test clearly defined rules, account for costs and slippage, and use risk limits before risking capital. Read our editorial policy.
SIBI and BISI are ICT's specific terminology for the two types of Fair Value Gaps, classified by the institutional imbalance they represent. BISI stands for Buy-Side Imbalance Sell-Side Inefficiency — a bullish FVG. SIBI stands for Sell-Side Imbalance Buy-Side Inefficiency — a bearish FVG. These terms clarify the nature of each FVG: who was imbalanced (dominant), and who was inefficient (absent) during the gap formation.
BISI — Buy-Side Imbalance Sell-Side Inefficiency
A BISI (bullish FVG) forms during a bullish displacement. The "Buy-Side Imbalance" refers to the overwhelming institutional buying that drove price through the gap level — buyers dominated so completely that sellers were entirely absent or inefficient at filling orders within the gap range. The "Sell-Side Inefficiency" means sellers could not participate at those price levels because the buying pressure was too aggressive.
The BISI acts as support on the retracement. When price returns to the BISI zone, the sellers who were previously inefficient are now attempting to sell into the zone — but the institutional buyers who created the BISI are there to absorb that selling and continue the bullish delivery. The BISI is where bulls are aggressive and bears are weak.
SIBI — Sell-Side Imbalance Buy-Side Inefficiency
A SIBI (bearish FVG) forms during a bearish displacement. "Sell-Side Imbalance" refers to institutional selling so dominant that buyers were entirely absent within the gap range. The "Buy-Side Inefficiency" means buyers could not fill orders at those prices during the displacement — they were overwhelmed.
The SIBI acts as resistance on the retracement. When price returns to the SIBI zone, buyers who were previously absent attempt to buy — but the institutional sellers who created the SIBI are positioned to absorb that buying and continue the bearish delivery. The SIBI is where bears are aggressive and bulls are inefficient.
Using SIBI/BISI in Practice
- Every FVG is either a BISI (bullish, acts as support) or a SIBI (bearish, acts as resistance).
- Only buy BISI zones in bullish institutional order flow. Only sell SIBI zones in bearish order flow.
- Never buy a SIBI and never sell a BISI — the institutional imbalance is against you.
- When a BISI is violated (price trades through it), it may become a SIBI equivalent in the new direction — this is the IFVG (Implied/Inverted FVG) concept.
- Mark all FVGs on your chart with their classification: BISI for bullish FVGs (mark in green), SIBI for bearish FVGs (mark in red). This visual distinction immediately tells you which FVGs are tradeable in which direction.
The SIBI/BISI terminology is useful beyond just naming — it reinforces the directional discipline required for FVG trading. By explicitly labeling each FVG as SIBI or BISI, you are forced to confront the question: "Is this FVG in the direction of my bias?" A bullish trader looking at a SIBI must consciously recognize they are looking at bearish institutional imbalance — a reminder not to buy it. This labeling practice reduces counter-trend FVG entries significantly.
Worked hypothetical example
In a hypothetical bullish example, candle one's high is 100 and candle three's low is 102, leaving a visible gap between 100 and 102. Under the chosen terminology, a trader may mark this as BISI. For a bearish SIBI example, candle one's low is 102 and candle three's high is 100. These labels describe the candle relationship; they do not predict a return to the gap.
Failure case and what to test
A frequent testing mistake is to mark only gaps that later react and ignore those price never revisits or trades through. Apply the same naming rule to every eligible sequence, regardless of its eventual outcome.
Test checklist
- Write the candle-boundary rule and test bullish and bearish cases separately.
- Record revisits, partial trades through and full crosses.
- Evaluate entry rules after spread, slippage and the stated invalidation.
RELATED READING
Continue with guides selected for overlapping concepts and practical context.