ICT Fibonacci Levels: Ratios, Anchors and Testing Rules
A practical guide to documenting Fibonacci anchor points and retracement ratios used in ICT setups, including why definitions vary and why a ratio alone does not establish a precise or profitable entry.
Framework note: ICT terms are interpretations of price action, not proof of institutional motives or a market algorithm’s intent. No setup is guaranteed. Test clearly defined rules, account for costs and slippage, and use risk limits before risking capital. Read our editorial policy.
Fibonacci retracement is one of the most widely used tools in technical analysis — and one of the most widely misused. Most traders apply standard Fibonacci levels (38.2%, 50%, 61.8%) to random swings and wonder why the reactions are inconsistent. ICT's approach is fundamentally different: specific levels, specific anchoring rules, and specific context requirements that transform Fibonacci from a guessing game into a precision tool.
The ICT Fibonacci Level Set
ICT uses a custom set of Fibonacci levels that differ from the standard textbook approach. The key levels are: 0% (the swing extreme you anchor to), 20.5% (a minor level), 28.5% (the Premium/Discount boundary in specific models), 38.2% (standard level), 50% (the equilibrium — CE of the range), 61.8% (standard golden ratio), 62% (ICT's OTE start), 70.5% (the primary OTE entry level), 78.6% (OTE outer boundary), 79% (ICT's OTE end), and 100% (the other swing extreme).
Some ICT approaches use 50% as a range midpoint and study the 62–79% retracement region as an OTE zone, with 70.5% as one reference ratio. These levels are conventions to test, not universal or inherently precise entries.
How to Anchor ICT Fibonacci Correctly
Fibonacci anchors depend on the selected swing rule. State how a swing is identified and confirmed before drawing the ratios; there is no universally applicable anchor point that guarantees the retracement levels will be meaningful.
A displacement filter can be defined using measurable candle-body, overlap or structural-break criteria. These are operational definitions, not proof of institutional delivery; apply the same thresholds to all examples to avoid hindsight selection.
The OTE Trade Using ICT Fibonacci
- Identify a genuine bullish displacement swing (anchor low to high, 0% to 100%).
- Mark the 62% level (OTE start), 70.5% level (primary entry), and 79% level (OTE end).
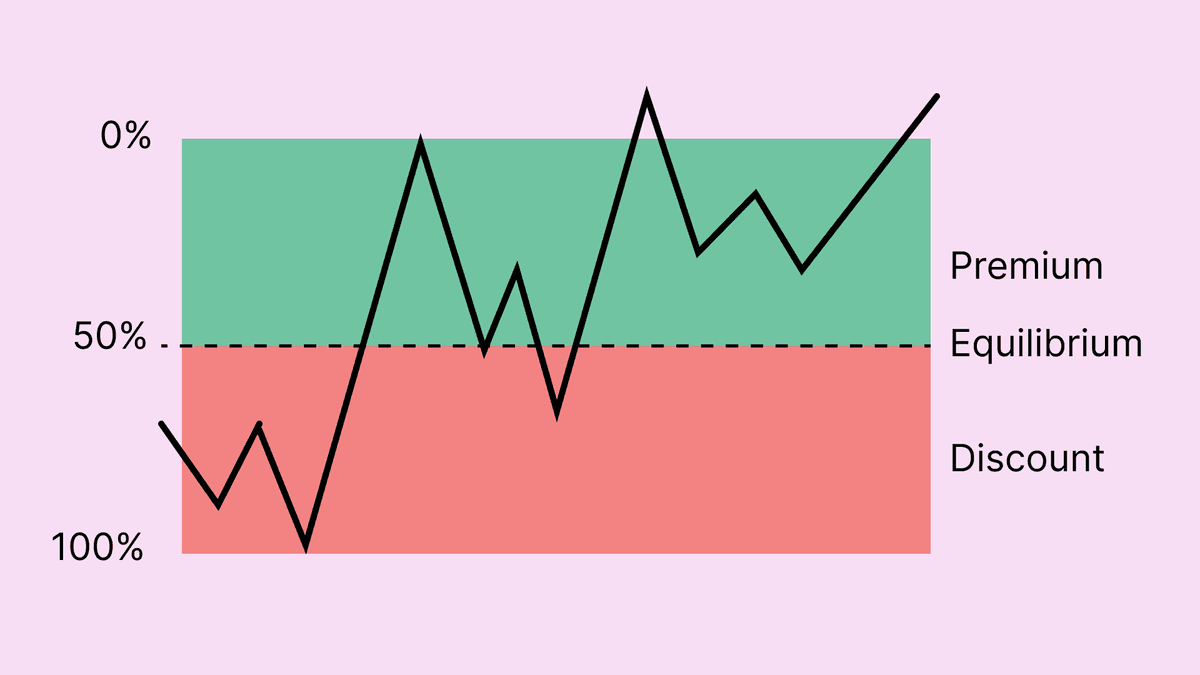
- Mark the 50% level (equilibrium) as the boundary between premium and discount.
- When price retraces into the 62-79% zone, you are in the OTE — the discount zone for a bullish entry.
- Switch to the 5-minute chart within the OTE zone. Wait for a bullish MSS or a bullish FVG to form.
- Enter at the CE of the 5-minute FVG (or the 70.5% level if no FVG is available). Stop: below the 100% level (the original swing low). Target: the 100% extension or beyond to the next BSL.
ICT Fibonacci for Targets — The Extension Levels
Beyond the 0-100% range, ICT also uses Fibonacci extension levels for targeting. The 127.2% extension (beyond the 100% level in the direction of the trade) is a common first target. The 161.8% extension is the standard golden ratio extension target. The -0.5 and -1 levels (below 0% for a bullish trade) represent the liquidity levels below the original swing that the algorithm may target before reversing.
The most common Fibonacci mistake in ICT trading: anchoring to a minor swing instead of the major displacement. If your 70.5% level does not align with any visible PD Array (OB, FVG, or structural level), you have anchored to the wrong swing. Reanchor to the next larger swing until the 62-79% zone aligns with a real PD Array — that alignment is the confirmation you have found the correct anchor points.
Worked hypothetical example
Suppose a trader measures a hypothetical move from 100 to 110 and has preselected the 62–79% retracement region for study. That places the candidate area roughly between 102.1 and 103.8. Price trades into the area, but without the trader’s separate confirmation rule there is no entry; the ratio is a location reference, not a signal on its own.
Failure case and what to test
Moving the anchors after the move or testing only the levels that appear to work creates hindsight bias. Retracement ratios are mathematical references and do not establish that institutions will enter at a given price.
Test checklist
- State the swing-anchor rule and ratio settings before the sample.
- Record how often price reaches each zone and what happens next.
- Compare the result with simple fixed-percentage retracements after costs.
RELATED READING
Continue with guides selected for overlapping concepts and practical context.